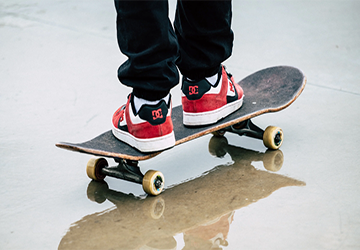
Skateboarding is more than just a sport; it's a canvas for self-expression. Imagine riding on a board that reflects your personality, style, and preferences. Building and customizing your skateboard is the ultimate way to make this happen. Whether you're a seasoned skater or a complete newbie, crafting your deck from scratch can be an incredibly satisfying journey.
In this guide, we'll break down the process for you in straightforward terms; there is no need for any fancy jargon or complicated instructions. So, let's roll up our sleeves and explore the art of creating a skateboard that's uniquely yours.
Step 1: Gather Your Gear
Before diving into the DIY skateboarding world, ensure you have all the necessary tools and materials. Here's what you'll need:
· A Skateboard Deck: This is the leading platform for your skateboard.
· Grip Tape: The gritty surface you stick on the deck for traction.
· Trucks: The metal parts that hold your wheels.
· Wheels: Well, you can't skate without them!
· Bearings: These small round pieces fit inside your wheels for smooth rolling.
· Skateboard Hardware: Nuts, bolts, and screws to hold everything together.
· Skateboard Tools: A wrench and a screwdriver are your best friends here.
· Safety Gear: Don't forget a helmet, knee, and elbow pads for protection.

Step 2: Choose Your Deck
The deck is the heart of your skateboard. It comes in various shapes, sizes, and materials. When picking one, consider your riding style and body size. Use a smaller deck for better control if you're into street tricks. If you're more into cruising and carving, a bigger deck might be your jam.
Pro Tip: You can also choose between different deck materials like wood or composite. Wood offers a classic feel, while composites are durable and lightweight.
Step 3: Apply Grip Tape
Grip tape is essential for keeping your feet glued to the board. Clean the deck's surface with a cloth or paper towel to remove dirt or dust. Peel the backing off the grip tape and carefully lay it on the deck.
Make sure it covers the entire surface. Press down firmly, starting from one end and moving to the other. Smooth out any air bubbles or wrinkles. Now, use a sharp knife or skateboard tool to trim the excess grip tape along the edges of the deck. Be cautious not to cut yourself!
Step 4: Attach Trucks
Trucks are what connect your wheels to your deck. Here's how to attach them:
1. Place the trucks on the underside of your deck, ensuring they align with the bolt holes.
2. Insert the screws through the holes in the deck and into the trucks.
3. Tighten the nuts onto the screws with your skateboard tool. Ensure they're snug but not too tight; you want your board to turn smoothly.
Pro tip: Your front truck usually has a smaller, raised kingpin. This helps with steering and turning.
Step 5: Add Wheels and Bearings
Now comes the fun part - adding wheels! But first, you'll need to insert the bearings into them. Place a path into the center of one wheel and press down firmly to secure it in place. Repeat this for all four wheels. Once your wheels have approached, slide them onto the trucks' axles. Ensure they're nice and tight but not so close that they can't spin freely.
Step 6: Tighten It Up
Now, let's make sure everything is snug! Use your skateboard tool to double-check that all the nuts, bolts, and screws are properly tightened. Loose hardware can be dangerous, so take this step.
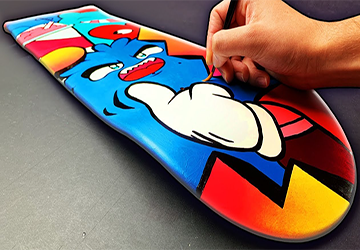
Step 7: Customize Your Board
This is where your skateboard becomes uniquely yours. Get creative!
Deck Art: You can paint, draw, or stick decals to your deck to give it a personalized look.
Stickers: Skateboard stickers are a classic way to add personality to your board.
Grip Tape Art: Some skaters even get artsy with grip tape designs. Just use a sharpie or colored grip tape to create unique patterns.
Customization is all about expressing yourself, so let your creativity flow!

Step 8: Safety First
Before you hit the streets, park, or skate ramp, make sure you're geared up with the proper safety equipment:
Helmet: Protect your noggin! Always wear a certified skateboard helmet.
Knee and Elbow Pads: Falls happen, so guard your joints.
Wrist Guards: These can prevent nasty wrist injuries.
Skateboarding is tons of fun, but it can be risky. Safety gear should be non-negotiable!
Step 9: Practice Makes Perfect
Building and customizing your skateboard is just the beginning. Now, it's time to hit the pavement and practice. Start with the basics, like pushing, turning, and stopping. You can progress to more advanced tricks and maneuvers as you gain confidence.
Remember, skateboarding is all about progress. Stay encouraged if you fall or struggle with certain tricks. Every skater, from beginners to pros, went through the learning curve.
Step 10: Maintenance Matters
Your skateboard will need some TLC to stay in top shape. Here are some essential maintenance tips:
Keep an Eye on Your Hardware: Regularly check for loose bolts and tighten them as needed.
Clean Your Bearings: Over time, bearings can accumulate dirt and grime, causing your wheels to spin less smoothly. Clean them with skateboard-specific bearing cleaner.
Rotate Your Wheels: To ensure even wear, swap the positions of your wheels periodically.
Replace Worn-Out Parts: If your deck is chipped or cracked, your wheels are flat-spotted, or your grip tape is worn, it's time for replacements.
Wrapping It Up!
Building and customizing your skateboard is a practical skill and a fantastic way to express your unique style. Remember, skateboarding is about having fun and enjoying the ride. So, gather your gear, choose your deck, apply grip tape, attach trucks, add wheels and bearings, tighten it up, and customize your board to make it yours.
Remember safety gear and regular maintenance to keep your skateboard rolling smoothly. Most importantly, keep practicing and pushing your limits. I hope you found this info helpful. Stay tuned for more!


